How to Write an Invoice: Step-by-Step Guide (+ Template)

Table of Contents
- Learning How to Write an Invoice The Right Way
- 1. Start Your Invoice with a Professional-looking Layout
- 2. Add Company Details & Client Contact Information
- 3. Add a Unique Invoice Number, plus the Invoice Creation Date & Due Date
- 4. Write a Description for Each of the Services Provided in the Job
- 5. Calculate the Total Amount Due
- 6. Add Your Payment Methods & Terms
- 7. Thank Your Customer for Choosing You
- 8. Send Your Invoice through Different Channels
- Summarizing How to Write an Invoice
- Best Practices for Invoicing Professionally in 2024
- FAQs About Writing an Invoice
Learning how to write an invoice is an important skill, whether you’re selling a product, doing a small job, or starting a business. An invoice is a simple document that shows what was sold, how much it costs, and how the customer should pay. In this article, you’ll learn the basic steps to create a clear, professional invoice that anyone can understand.
Learning How to Write an Invoice The Right Way
Writing an invoice may sound complicated at first, but it’s actually a simple and useful skill that anyone can learn. Knowing how to write an invoice helps you stay organized, get paid on time, and look professional—whether you’re doing a school project, selling something online, or starting a small business. Invoices work like clear receipts: they explain what was done, how much it costs, and when payment is due.
In this article, we’ll break down the whole process step by step. You’ll learn what information every invoice should include, why invoices matter, and how to make one that is easy for your customer to understand. We’ll also look at different types of invoices, common mistakes to avoid, and simple tips to make your invoice look clean and professional. By the end, you’ll feel confident creating your own invoices whenever you need them.
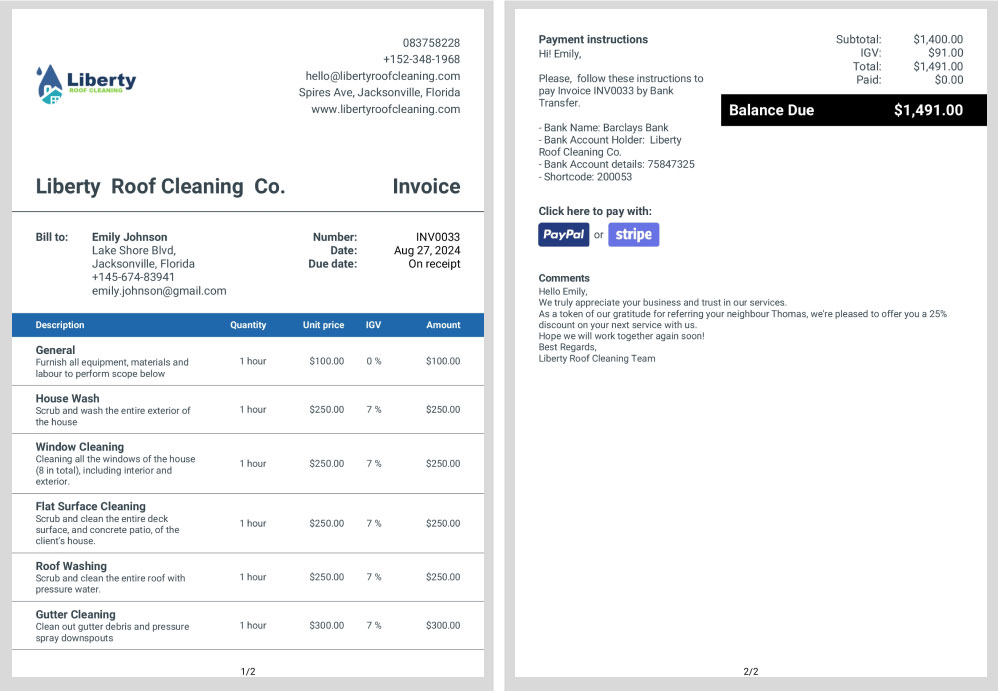
Take a look at the example below to understand how to write your own invoice:
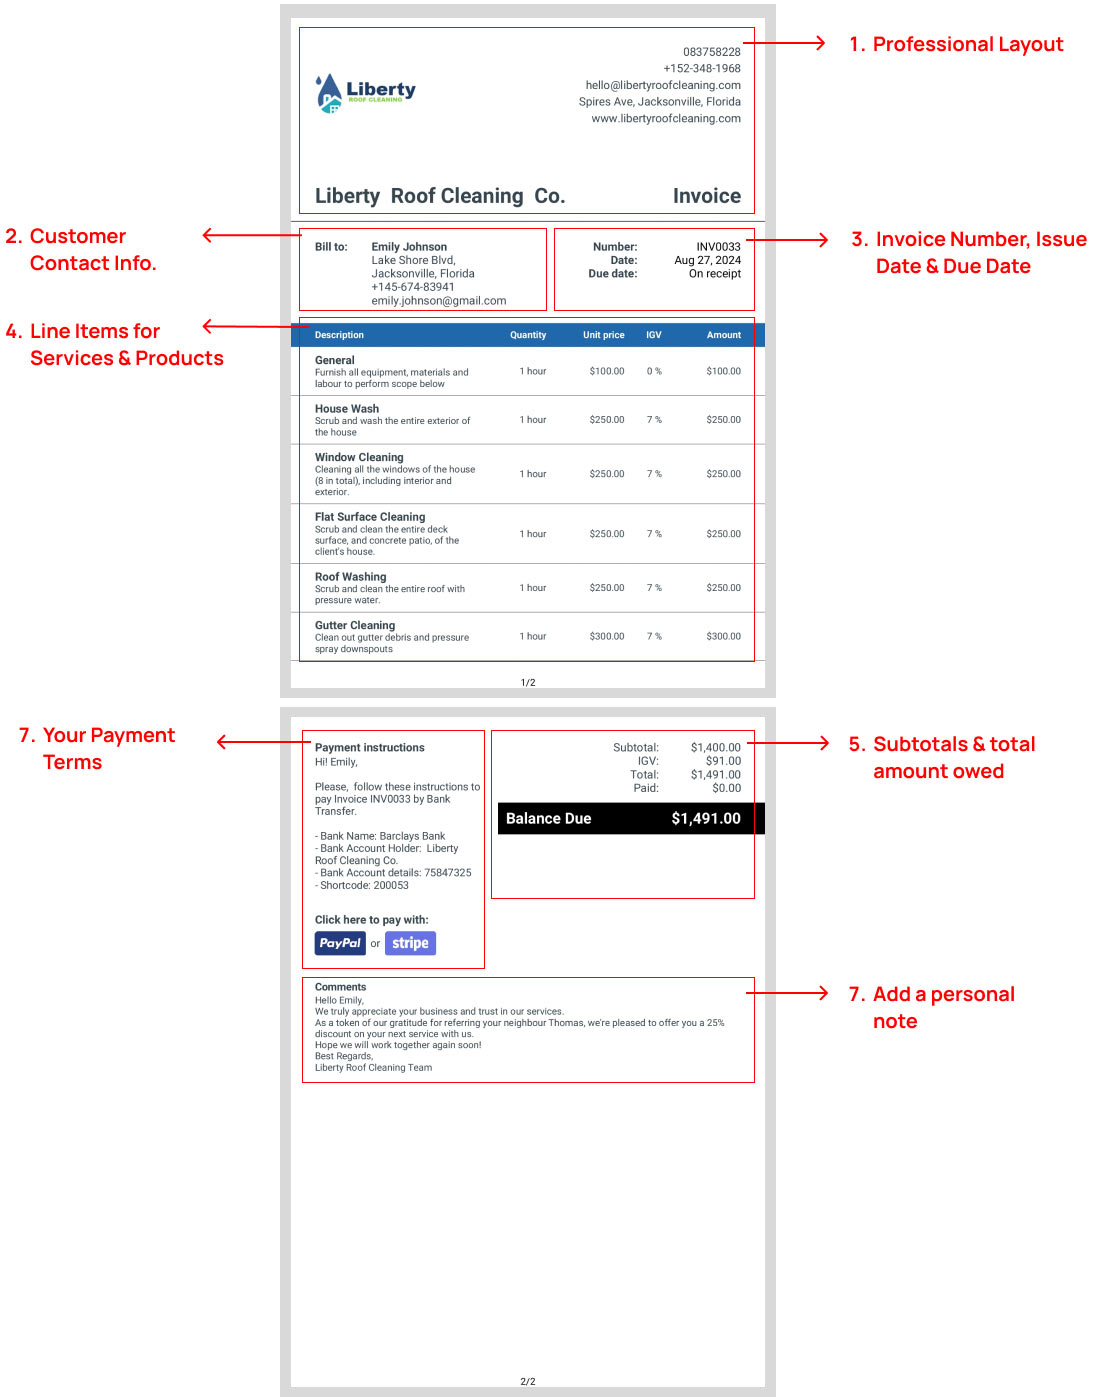
There are many ways of creating invoices for your customers. You can craft invoices by hand, or design an invoice template using Word, Excel, PDF, Canva, Illustrator, or any kind of digital tool.
However, the easiest method is using Invoice Fly to help you automate your invoicing process, with Templates, Calculators, and our Invoice Generator tool, which automates this process and helps you send invoices fast.
Try our Invoice Generator tool!
Send professional-looking invoices to your customers and get paid faster with our Invoice Generator tool. Try it now!
Tip for Pros: With our Invoice Generator tool, you can fully customize your invoices, and form your company logo, layout, corporate colors, and text boxes. Give it a try!
RELATED ARTICLE: What is an Invoice? Everything You Need To Know
1. Start Your Invoice with a Professional-looking Layout
To create the perfect invoice template for your business, you can start by crafting a professional-looking header layout.
It should include your official logo and brand name, with corporate colors, usually aligned on the top-left side of the invoice.
The more professional you look, the more likely you will be to receive fast payments from your clients, as they will feel more secure that your business is trustworthy and reliable.
RELATED ARTICLE: What is a Proforma Invoice? Meaning, Purpose and Examples
2. Add Company Details & Client Contact Information
The next step when writing an invoice is to add your company details, including your company name, address, email address, and phone number. Add these details at the top of the invoice.
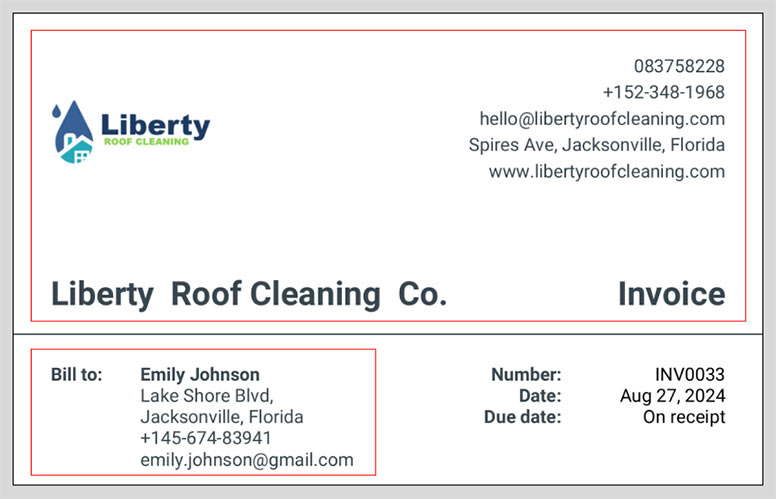
This information is helpful to your clients and helps them reach out to you in case they need aid getting in touch with you, or refer your business to their friends and family, due to the quality of your services.
The next step is adding your client’s contact details to the top of your invoice, including the client’s name, the company name (in case it’s a business), phone number, billing address, email address, and service address in case it’s in a different place.
3. Add a Unique Invoice Number, plus the Invoice Creation Date & Due Date
It is essential to emphasize these details for both your client and your business. The invoice number is crucial for organizing and tracking invoices in chronological order.
The creation date indicates when the invoice was issued, helping you and your client keep track of the timeline.
The invoice due date is vital for setting clear expectations, ensuring there are no misunderstandings and avoiding any payment delays.
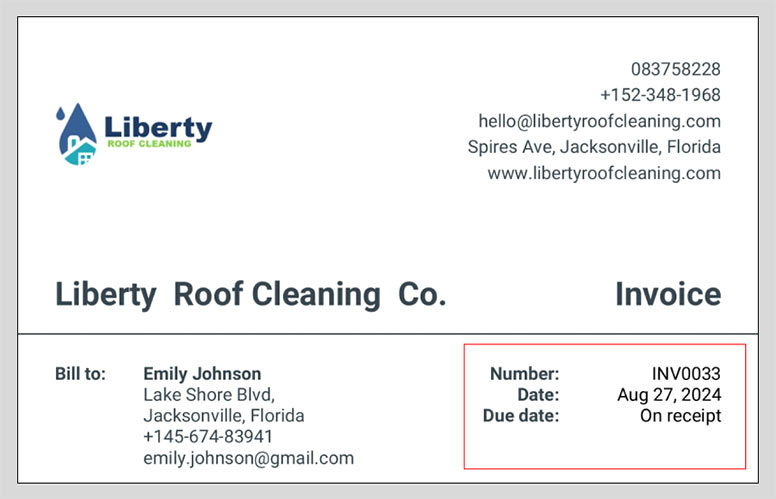
Additionally, the invoice number and invoice date are essential to meet legal requirements. Proper organization of this information is crucial for tax reporting and managing recurring invoices with the same clients.
Furthermore, if you need to follow up on an unpaid or overdue invoice, referencing the invoice number will help ensure clear communication with your customer, making it easier for both parties to confirm the services provided.
With Invoice Fly, your company and customer details, as well as the invoice number and date, are automatically generated each time. You’ll never have to worry about forgetting or entering the wrong information on your customer invoices.
RELATED ARTICLE: Invoice vs. Bill: What Is The Difference?
4. Write a Description for Each of the Services Provided in the Job
When you’re describing the items included in your invoice, you have to write down the main product or service sold, and then add the detailed tasks, products, and materials used to complete the job.
Remember to include a detailed description of each item used. Be sure to account for the hours dedicated to each service, the unit price, the specific taxes you need to charge, and the total amount for that service.
When naming your line items, be specific about what your client is paying for. Instead of simply listing “Roof Washing,” specify the service by writing “Scrub and clean the entire roof with pressure water”.
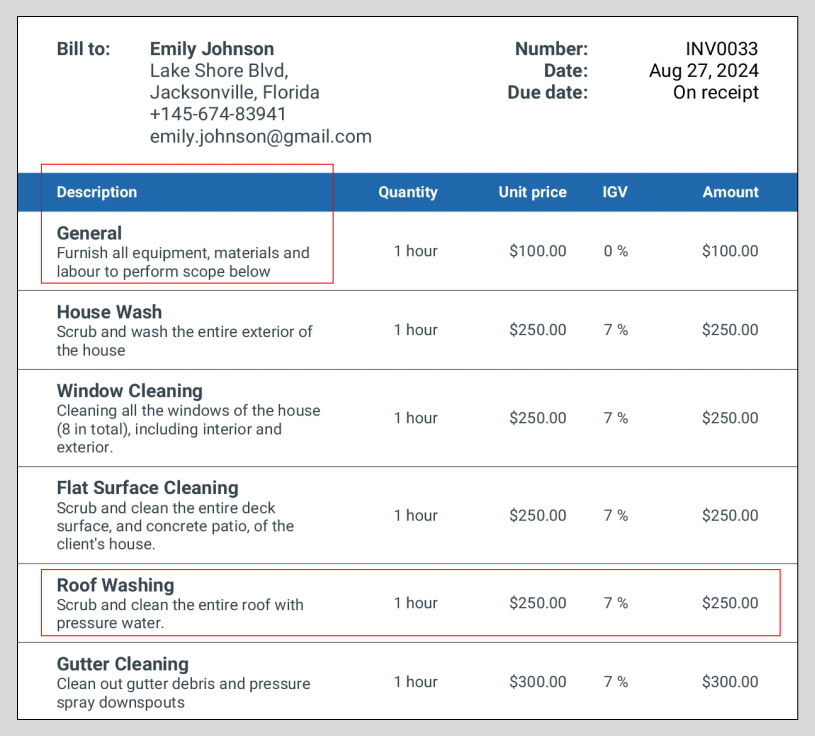
You may also include a list of the products, brands, and materials used for that specific job.
This itemized list – an important part of every invoice – will help your customers understand better the services you executed for the job, and the amount of time invested, plus materials used.
Customers are more likely to pay your invoices on time if they understand what they are paying for. Writing an invoice with clear, descriptive line items can encourage quicker payment and reduce questions that might delay the billing process.
RELATED ARTICLE: What Is A Ledger Balance? Definition, Formula and Examples
5. Calculate the Total Amount Due
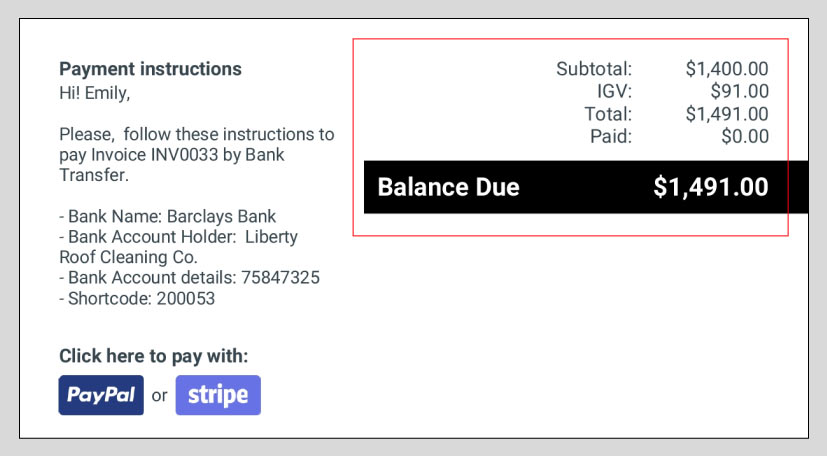
The next step of writing your invoice is to sum up the total of each service and line item. Determine the subtotal price and place it almost at the right bottom part of the invoice. Don’t worry about calculating the final amount, Invoice Fly will do that part for you automatically.
The following step involves including any kind of discount you want to offer to your client and also add the taxes for this specific service, in case you need to add it.
The final amount due has to stand out (with a dark background, for example) to avoid any misunderstandings about what’s the due payment of the invoice.
6. Add Your Payment Methods & Terms
The payment process is quite important if you want to have a good customer experience. Making this step easy for your clients will avoid any kind of delay in paying you for your services.
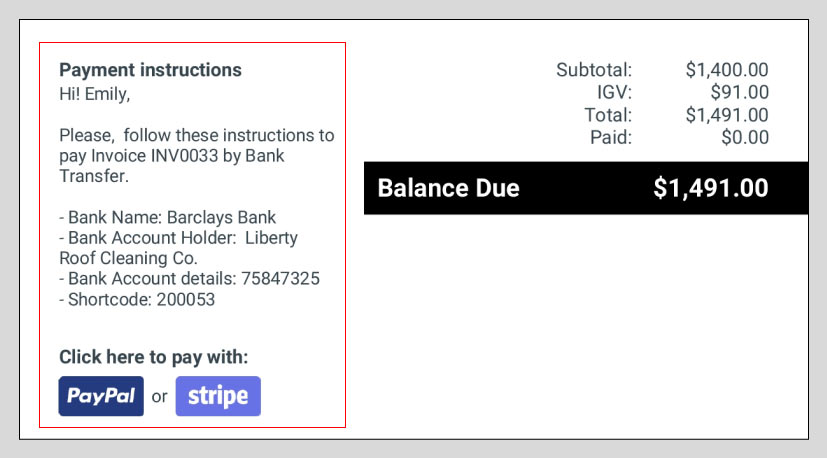
Here’s what to write in the payment section of your invoice:
- The total balance due, including any kind of discount or sales taxes
- Bank account and payment details for a bank transfer
- Other online payment methods like Stripe or PayPal
- Any additional notes or instructions
7. Thank Your Customer for Choosing You
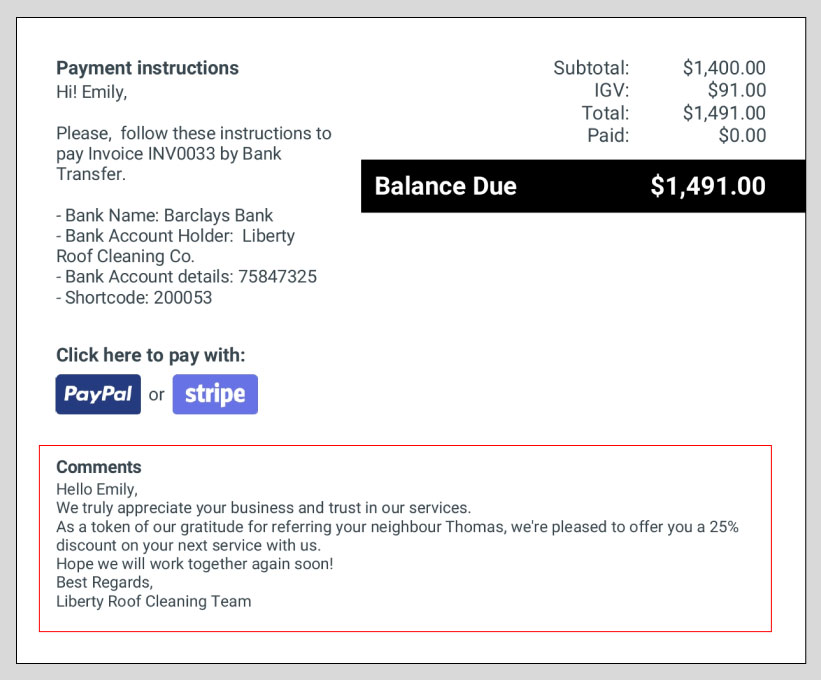
This is the last part of writing the invoice and it’s probably the last thing the client will read before paying.
Express gratitude for their continued loyalty and remind them that you look forward to doing business in the future. A simple “thank you” note will work wonders.
You can also add any extra information about upcoming promotions, or referral programs, or request them to leave a positive review about your business.
8. Send Your Invoice through Different Channels
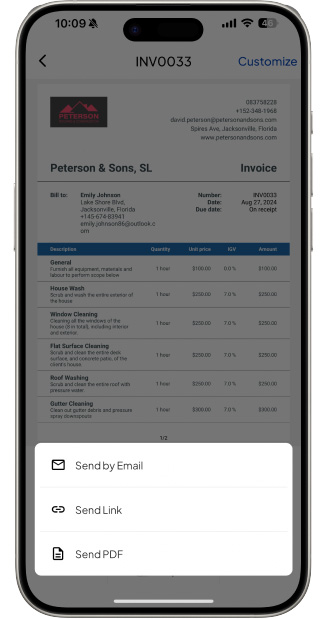
Now that you have created your invoice it is ready to be sent to your customer. As the next step, you need to choose the best channel of communication.
The channel should be a commonly used one, making it easy for your customers to receive the invoice, open it, and pay you.
Invoice Fly offers different communication channels to send invoices. You can do it via Email, you can also create a link to share it via WhatsApp, Telegram, or any preferred communication tool.
And you can also download a PDF in case it’s more convenient for both parties.
Summarizing How to Write an Invoice
To sum up, the invoice structure includes a header with your company logo, name and details, the client’s name and details, a list of products and services provided, a description of all costs and the total amount due. Also important is an invoice creation date and payment due date, your payment terms and a thank you message for doing business with you.
Best Practices for Invoicing Professionally in 2024
Now that you have become an expert in writing invoices, let’s go through the best practices for invoicing in 2024, so you’re up to date:
- Send digital invoices online with Invoice Fly.
- Accept deposits and signatures to get paid faster and increase your cash flow.
- Make it super easy for your customers to pay you online or by credit card.
- Use free invoice templates to save office time and look more professional.
Creating and sending invoices to your clients isn’t meant to be a hard and time-consuming task. In 2024, many processes need to be automated and invoicing is one of them.
Win more clients by sending them professional-looking estimates
Utilize our free estimate template to produce polished, professional estimates.
FAQs About Writing an Invoice
Write your name/business name, the customer’s name, the date, a list of what you’re charging for, the costs, the total amount, and how you want to be paid.
Yes. Anyone can make their own invoice as long as it includes the needed information.
Yes. A handwritten invoice is legal as long as it is clear, readable, and contains all required details.
An invoice is basically a clean list with your business info at the top, the customer’s info, the date, a table of items or services with prices, and the total at the bottom, with a note on when and how you want to be paid.
Your name and address, the customer’s name and address, the date, a description of the goods or services, the price, the total, and any taxes if needed.


