CHAPTER 2
How to Create an Invoice
that Gets Paid
Invoice Fly makes it simple to create professional invoices, whether you’re generating a quick invoice online or managing ongoing billing for multiple clients. You can use our free online invoice generator to create and download a polished invoice in minutes.
And when your invoicing needs grow, you can download the Invoice Fly App which supports payment tracking, recurring invoices, online payments, and automated reminders.

Regardless of how you use Invoice Fly, every invoice follows the same professional structure.
Creating Your Invoice
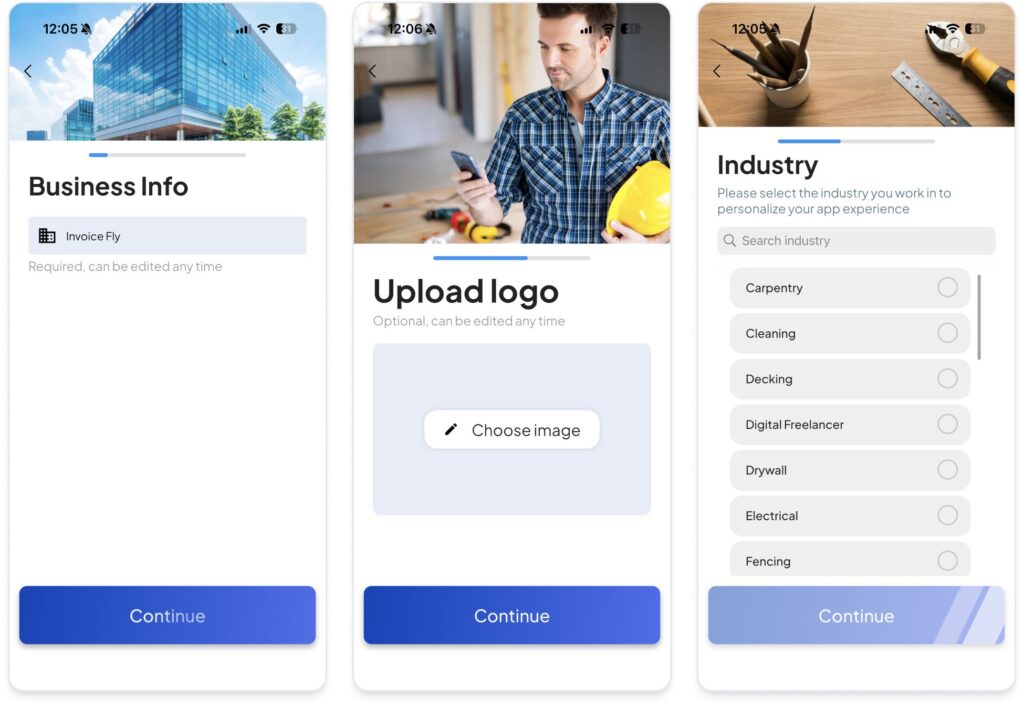
Step 1: Enter Your Business Information
Start by adding your business name, address, email, and phone number. This identifies who is issuing the invoice and ensures your client knows how to contact you. If you’re using Invoice Fly App regularly, your details can be saved for future invoices.
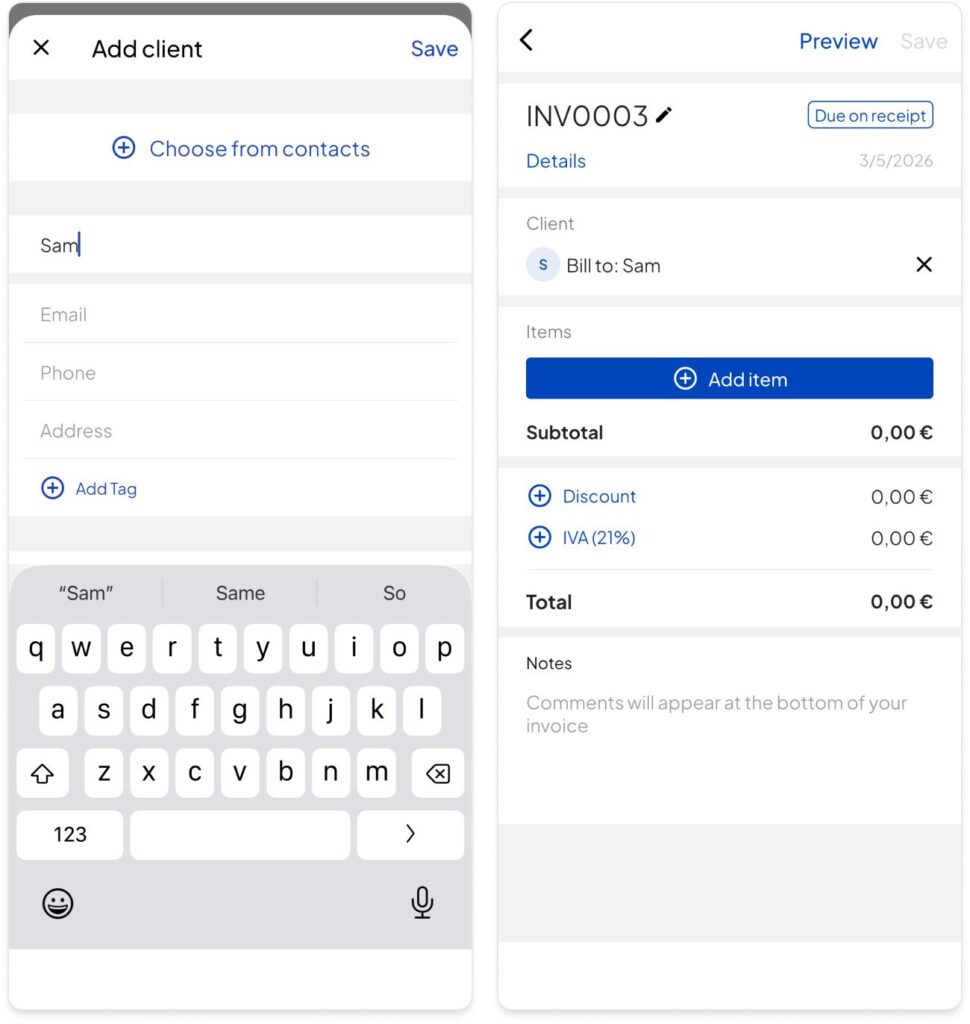
Step 2: Add Your Client's Details
Enter your client’s name and contact information. Make sure everything is accurate to avoid delivery or payment delays. Clear identification helps prevent confusion, especially when working with larger companies.
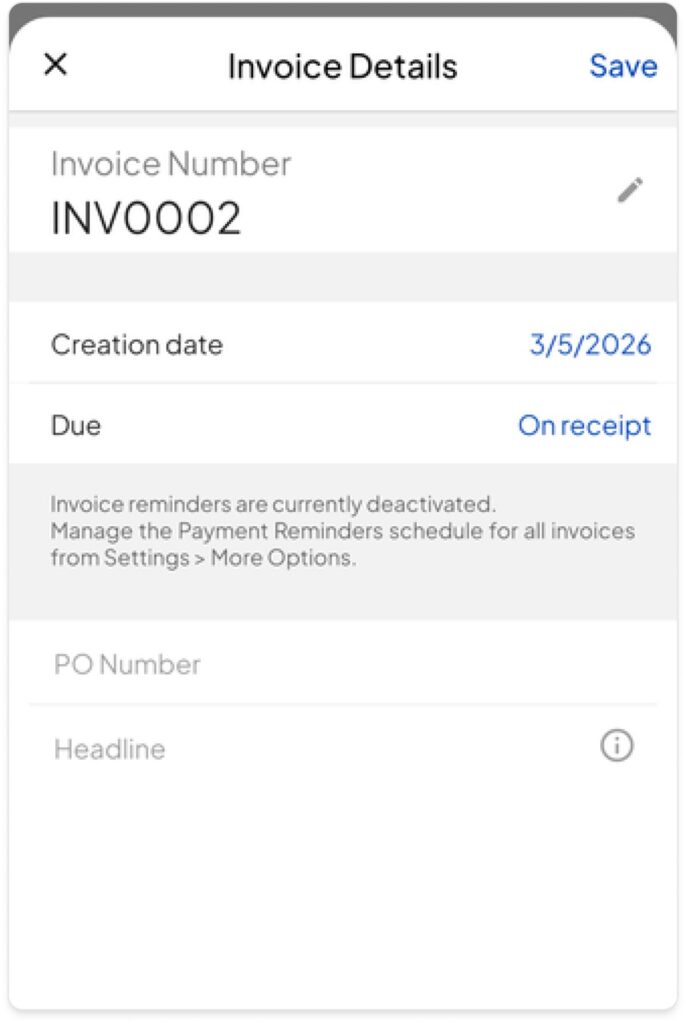
Step 3: Include the Invoice Date and Number
Add the date the invoice is issued and assign a unique invoice number. A consistent numbering system helps you track invoices and maintain organized financial records. Invoice Fly can automatically generate invoice numbers to keep things consistent.
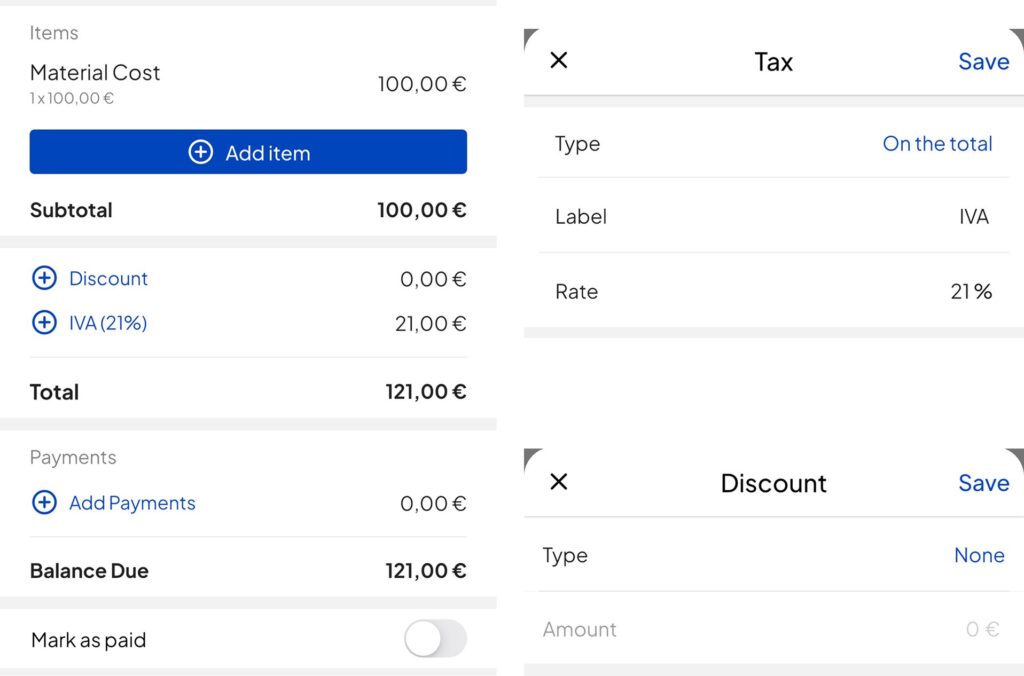
Step 4: List the Services or Products Provided
Add each service or product as a separate line item. Include:
- A clear description
- Quantity (if applicable)
- Unit price
Being specific reduces questions and speeds up approval. As you enter items, totals are calculated automatically.
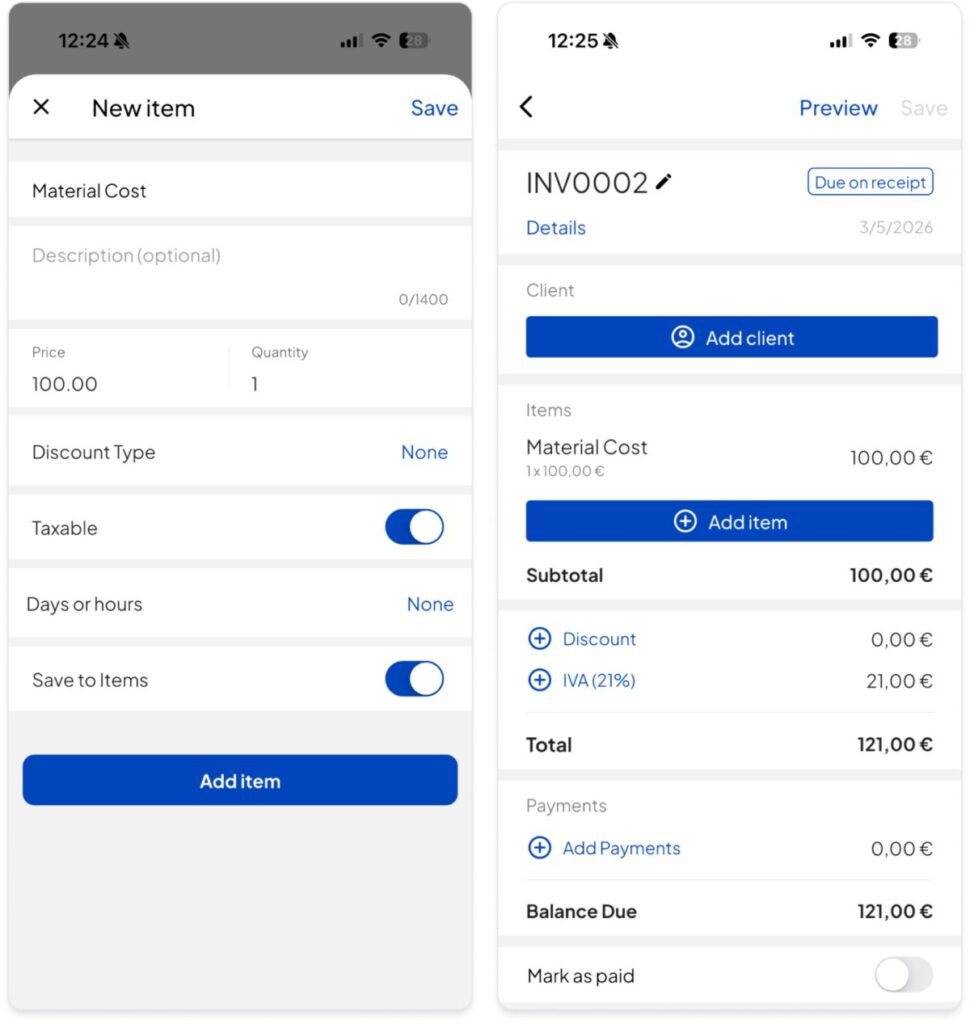
Step 5: Add Taxes and Discounts
If applicable, include any required taxes such as sales tax or VAT. Discounts should also be clearly shown before calculating the final total.
Transparency builds trust and avoids disputes.
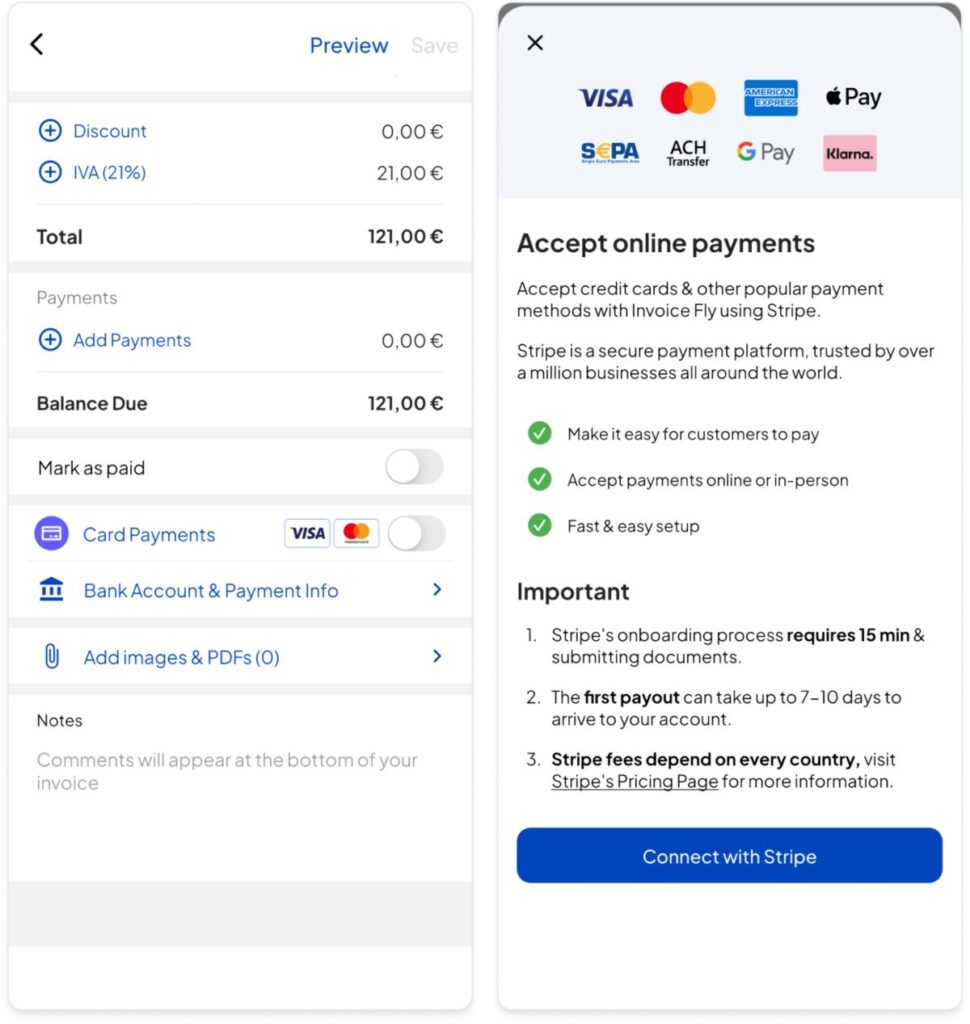
Step 6: Set Payment Terms
Specify:
- The due date
- Accepted payment methods
- Any late payment terms
Clear payment instructions make it easier for clients to process payment quickly.
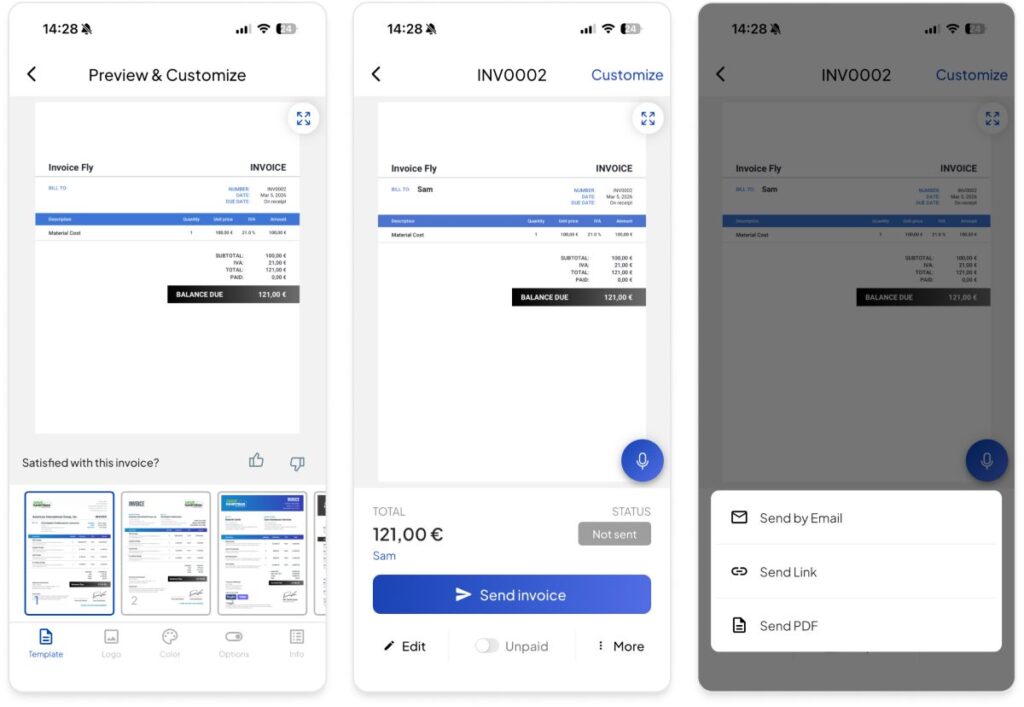
Step 7: Review and Send
Before sending, review the invoice to ensure all information is correct and complete. You can download your invoice as a professional PDF or send it directly with Invoice Fly App.
2.2 Sending Invoices: Best Practices
Once your invoice is complete, the way you send it can impact how quickly you get paid.
Follow these best practices:
1. Send the Invoice Immediately
Issue your invoice as soon as the work is completed or delivered. Delays in sending invoices often lead to delays in payment.
2. Double-Check All Details
Review totals, payment terms, and client information before sending. Small errors can create unnecessary back-and-forth.
3. Use a Clear Subject Line (If Emailing)
If sending by email, include the invoice number and due date in the subject line. For example: Invoice #104 – Due March 15
4. Include a Short Message
Add a brief, professional note thanking the client and reminding them of the payment terms.
5. Make Payment Easy
Clearly state how the client can pay. If online payments are enabled through Invoice Fly App, clients can pay directly to your account via stripe, paypal, etc.. add more.
6. Keep a Record of Sent Invoices
Always maintain a record of when invoices are sent. Invoice Fly allows you to track invoice status so you know which invoices are pending, paid, or overdue.